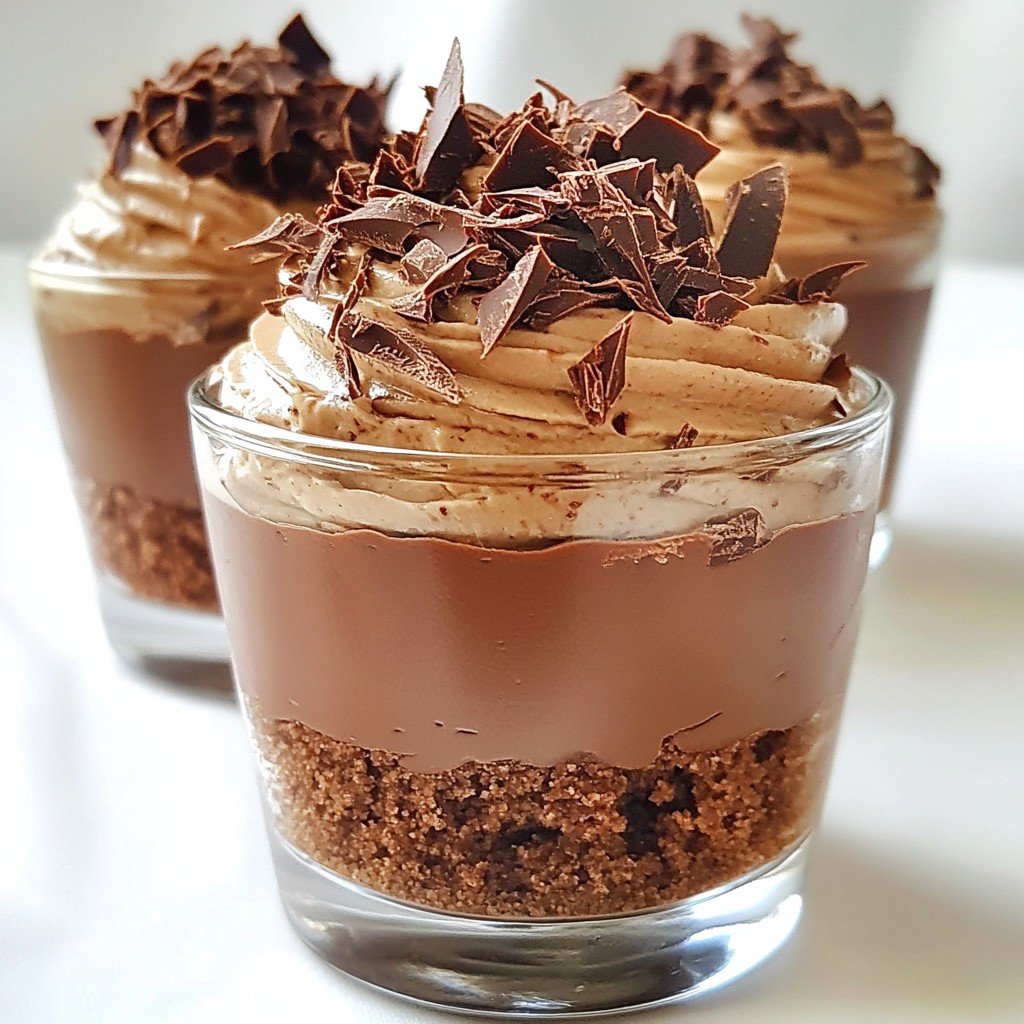
Craving a dessert that’s both quick and delightful? Look no further! These No Bake Chocolate Cheesecake Cups are easy to make and bursting with flavor. With a rich chocolate cookie base and a creamy, chocolatey filling, this treat satisfies any sweet tooth. Perfect for parties or a cozy night in, you’ll impress your friends and family without the hassle of baking. Let's dive into this yummy recipe!
Why I Love This Recipe
- Decadent Flavor: This no-bake chocolate cheesecake is rich and creamy, delivering an indulgent chocolate experience in every bite.
- Easy Preparation: With minimal cooking involved, this recipe is perfect for beginners and those short on time.
- Customizable: You can easily switch up the toppings or crust to suit your preferences and make it uniquely yours.
- Perfect for Any Occasion: These cheesecake cups are a delightful dessert for parties, gatherings, or simply a sweet treat at home.
Ingredients
Chocolate Cookie Crust
- 1 ½ cups chocolate cookie crumbs
- ½ cup unsalted butter, melted
Cheesecake Filling
- 8 oz cream cheese, softened
- ½ cup powdered sugar
- 1 cup heavy whipping cream
- ½ cup cocoa powder
- 1 teaspoon vanilla extract
- A pinch of salt
Garnish
- Chocolate shavings or chips
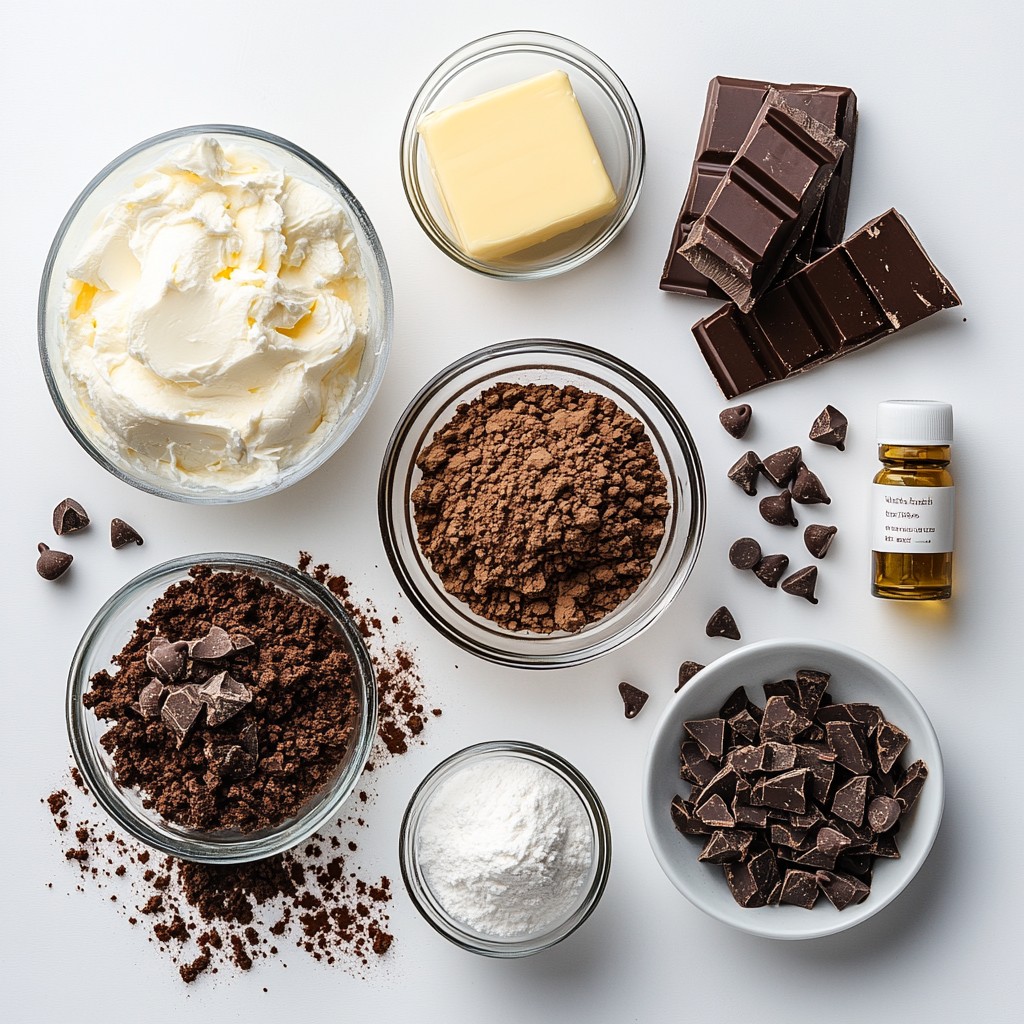
To create a delicious No Bake Chocolate Cheesecake Cup, you need simple ingredients. The chocolate cookie crust starts with chocolate cookie crumbs mixed with melted butter. This mix gives a sweet and crunchy base. The filling is rich and creamy. You will use cream cheese, powdered sugar, heavy whipping cream, cocoa powder, vanilla extract, and salt. Each element adds flavor and texture. Finally, top your cups with chocolate shavings or chips for that extra touch.
Each ingredient plays an important role. The chocolate cookie crumbs provide a rich base. Cream cheese makes the filling smooth. Heavy whipping cream gives it a light texture. Cocoa powder brings that deep chocolate taste, while vanilla adds warmth. A pinch of salt balances the sweetness.
This easy list of ingredients makes the cheesecake cups fun to prepare. You can find all these items at your local store. Next, let’s move on to how to put it all together!
Step-by-Step Instructions
Preparing the Crust
- In a medium mixing bowl, combine 1 ½ cups of chocolate cookie crumbs and ½ cup of melted unsalted butter.
- Stir until the mixture looks like wet sand.
- Divide this mixture evenly into small cups or dessert glasses.
- Press it down firmly to form a crust at the bottom.
- Set the cups in the fridge while you make the filling.
Making the Cheesecake Filling
- In a large bowl, beat 8 oz of softened cream cheese with ½ cup of powdered sugar.
- Mix until the cream cheese is smooth and creamy.
- Now, add 1 cup of heavy whipping cream, ½ cup of cocoa powder, 1 teaspoon of vanilla extract, and a pinch of salt.
- Beat this mixture on medium speed until it thickens and forms soft peaks.
Assembling the Cups
- Carefully spoon or pipe the thick filling over the crust in each cup.
- Smooth the tops with a spatula for a nice finish.
- To finish, sprinkle chocolate shavings or chips over the cheesecake layer for garnish.
- Place the cups back in the fridge for at least 4 hours, or until they are set.
Tips & Tricks
Perfecting the Texture
To make a great cheesecake, start with room-temperature cream cheese. Cold cream cheese clumps and does not mix well. It’s also key not to over-beat the filling. Mix just until fluffy and smooth. This keeps the filling light and creamy.
Serving Suggestions
Chill your cheesecake cups before serving. This makes them taste even better. For a nice touch, use decorative plates or platters. It makes a simple dessert look fancy and inviting.
Customization Ideas
Feel free to add different flavors to the filling. You could try almond, mint, or even orange zest. These will give your cheesecake a unique twist. You can also choose alternative toppings. Consider fresh berries, whipped cream, or even crushed nuts for a crunchy finish.
Pro Tips
- Chill the Ingredients: For a smoother filling, ensure your cream cheese and heavy whipping cream are well-chilled before mixing.
- Use Quality Cocoa Powder: Opt for a high-quality cocoa powder for a richer chocolate flavor in your cheesecake.
- Press Firmly: When forming the cookie crust, press down firmly to ensure it holds together and provides a sturdy base for the filling.
- Let Set in the Fridge: Allow the cheesecake cups to set for at least 4 hours; overnight is even better for the best texture and flavor.
Variations
Flavor Combinations
You can change up the flavors for your No Bake Chocolate Cheesecake Cups. Here are three tasty ideas:
- White Chocolate Variation: Swap out the cocoa powder for melted white chocolate. This gives a sweet, creamy twist.
- Mint Chocolate Version: Add a few drops of mint extract to the cheesecake filling. It adds a refreshing taste that pairs well with chocolate.
- Coffee-Flavored Cheesecake: Mix instant coffee granules into the cheesecake filling. This gives a rich coffee flavor that many love.
Each variation brings a new taste, making this dessert even more fun!
Dietary Modifications
If you have special dietary needs, you can still enjoy these cups.
- Gluten-Free Options: Use gluten-free chocolate cookies for the crust. This keeps the dessert safe for those avoiding gluten.
- Vegan Alternatives: Replace cream cheese with a vegan cream cheese. Use coconut cream instead of heavy whipping cream. These swaps keep the dessert plant-based.
These modifications let everyone enjoy a sweet treat!
Serving Sizes
Decide how you want to serve these cheesecake cups.
- Mini Cups vs. Standard Cups: You can use smaller cups for bite-sized treats. This is great for parties. Standard cups are perfect for a more satisfying dessert.
- Adjusting the Recipe for Larger Gatherings: If you need more servings, simply double or triple the recipe. Keep the same steps for making the cups.
This way, you can share the joy of No Bake Chocolate Cheesecake Cups with more friends!
Storage Info
Refrigeration
To store leftover cheesecake cups, cover them with plastic wrap or place them in an airtight container. This keeps them fresh and prevents them from drying out. For the best flavor, eat them within three days. The longer they sit, the softer the crust may get.
Freezing Instructions
Yes, you can freeze cheesecake cups! To do this, first, make sure they are well covered. Use plastic wrap or a freezer-safe container. When you are ready to eat them, thaw them in the fridge overnight. This helps keep the texture creamy and smooth.
Shelf Life
These no bake desserts stay fresh for about four days in the fridge. To extend their shelf life, avoid adding toppings until you are ready to serve. This keeps the toppings crunchy and delicious.
FAQs
How long does it take to make No Bake Chocolate Cheesecake Cups?
Making No Bake Chocolate Cheesecake Cups takes about 20 minutes to prep. After that, you need to chill them for at least 4 hours. So, the total time is about 4 hours and 20 minutes. This dessert is quick to prepare but needs time to set up.
Can I make these cheesecake cups ahead of time?
Yes, you can make these cheesecake cups ahead of time. I suggest making them a day before you plan to serve. This gives the flavors time to blend and the filling to set well. Just keep them in the fridge, covered, until you're ready to enjoy them.
What can I substitute for cream cheese?
If you need a cream cheese substitute, you have options. You can use Greek yogurt for a lighter taste. Silken tofu blended until smooth is another good choice. For a dairy-free option, try vegan cream cheese. Each will give you a different texture and taste, so pick what you like!
This recipe for No Bake Chocolate Cheesecake Cups is simple and fun. You start with a chocolate cookie crust, add a creamy filling, and top it with chocolate. Remember, keeping your cream cheese soft makes mixing easier. Chill these cups for the best taste, and feel free to try different flavors. You can even make them vegan! With proper storage, these treats can last for days. Enjoy your delicious creation and impress your friends!
.png)


